Did you know that there's a hidden Administrator account on your system?
Unlike regular administrator accounts, this one doesn't require confirmation for its actions. It has the highest set of permissions and acts like a root or superuser account. UAC prompts won't ask you if you allow something first - you can just do it.
However, this lack of restrictions may leave your system wide open to security risks. So, if you get infected with malware while signed into this "super" account, it's over. The Administrator account can't stop it from spreading everywhere. That's why you should never use it as your everyday account.
Still, it's very useful for deep troubleshooting and disaster recovery. Just remember to disable it when you're done using it.
Below, I'll demonstrate four different ways to enable or disable it. But make sure you sign in as an administrator (the regular kind!) before trying them.
You can easily switch the Administrator account on or off with these commands:
However, if you've renamed this account earlier or your system language isn't English, you'll have to replace "Administrator" in the command with the correct name or translation.
Or if you prefer this shell instead:
Again, if you've previously renamed the account or your system language isn't English, make sure you replace "Administrator" with the correct name/translation.
Local Users and Groups is a built-in tool that lets you manage user accounts and groups. It's only available to Windows 11 Pro, Education, and Enterprise. So, if you're a Home edition user, you've got limited options, but you can still use the previous two methods without any problems.
Here are the steps:
Local Security Policy allows you to configure security settings specifically on your local machine. Like the previous tool, it's limited to Windows 10 Pro, Education, and Enterprise editions.
To use it:
And that's it! Previously, we've covered how to turn it on or off in Windows 10, but with fewer options. Whichever method you end up using, don't forget to disable the Administrator account again when you no longer need it.
Unlike regular administrator accounts, this one doesn't require confirmation for its actions. It has the highest set of permissions and acts like a root or superuser account. UAC prompts won't ask you if you allow something first - you can just do it.
However, this lack of restrictions may leave your system wide open to security risks. So, if you get infected with malware while signed into this "super" account, it's over. The Administrator account can't stop it from spreading everywhere. That's why you should never use it as your everyday account.
Still, it's very useful for deep troubleshooting and disaster recovery. Just remember to disable it when you're done using it.
Below, I'll demonstrate four different ways to enable or disable it. But make sure you sign in as an administrator (the regular kind!) before trying them.
Via Elevated Command Prompt
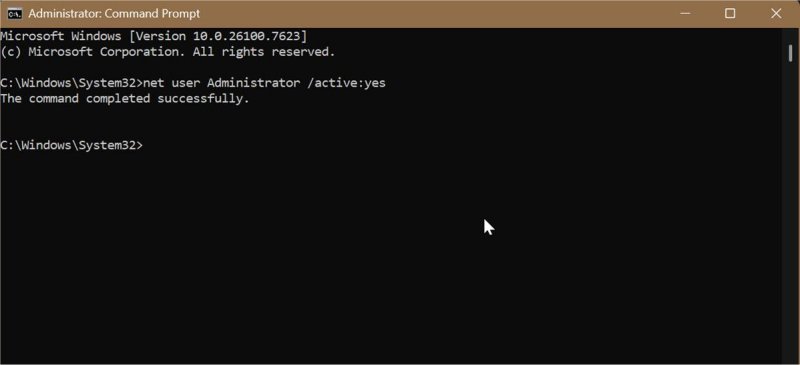
You can easily switch the Administrator account on or off with these commands:
- Type CMD in Windows Search and click on Run as Administrator.
- To enable built-in Administrator: Type net user Administrator /active:yes and press Enter
- To disable it: Type net user Administrator /active:no and press Enter.
- You should see this message: "The command completed successfully."
However, if you've renamed this account earlier or your system language isn't English, you'll have to replace "Administrator" in the command with the correct name or translation.
Via Elevated PowerShell
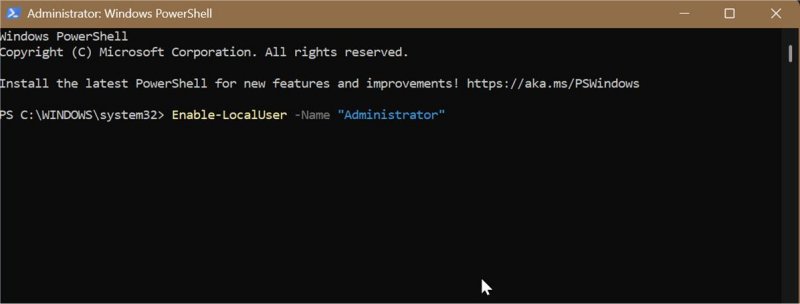
Or if you prefer this shell instead:
- Type PowerShell in Windows Search and click on Run as Administrator.
- To enable built-in Administrator: Type Enable-LocalUser -Name "Administrator" and press Enter.
- To disable it: Type Disable-LocalUser -Name "Administrator" and press Enter.
Again, if you've previously renamed the account or your system language isn't English, make sure you replace "Administrator" with the correct name/translation.
Via Local Users and Groups
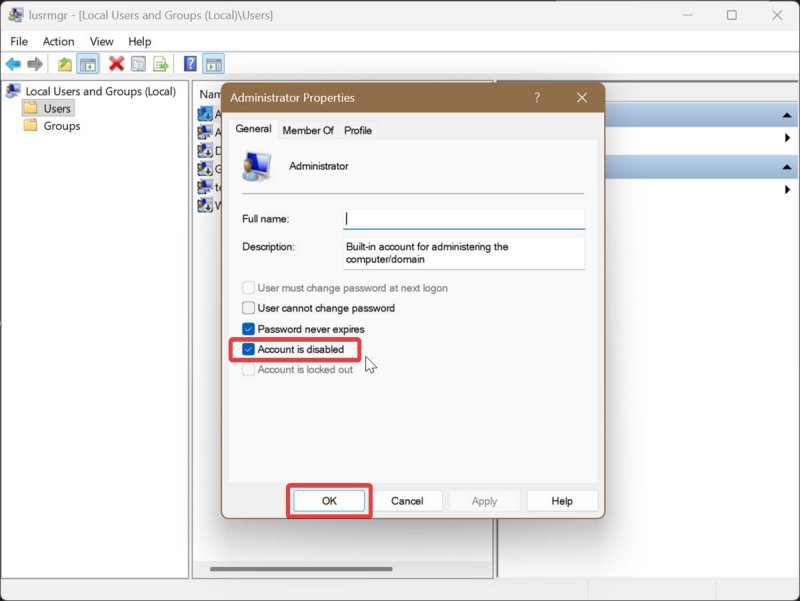
Local Users and Groups is a built-in tool that lets you manage user accounts and groups. It's only available to Windows 11 Pro, Education, and Enterprise. So, if you're a Home edition user, you've got limited options, but you can still use the previous two methods without any problems.
Here are the steps:
- Press Win + R, type lusrmgr.msc, and press Enter.
- On the left pane, click the Users folder.
- In the middle pane, double-click Administrator.
- To enable built-in Administrator: Uncheck Account is disabled and click OK.
- To disable it: Check Account is disabled and click OK.
Via Local Security Policy
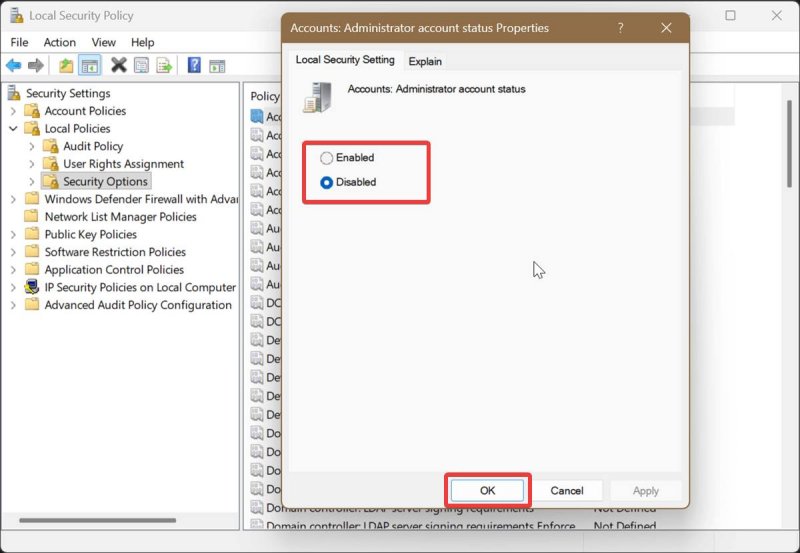
Local Security Policy allows you to configure security settings specifically on your local machine. Like the previous tool, it's limited to Windows 10 Pro, Education, and Enterprise editions.
To use it:
- Press Win + R, type secpol.msc, and press Enter.
- On the left pane, navigate to Local Policies > Security Options.
- On the right pane, double-click Accounts: Administrator account status. This will open a Properties window for it.
- To enable built-in Administrator: Check Enabled and click OK.
- To disable it: Check Disabled and click OK.
And that's it! Previously, we've covered how to turn it on or off in Windows 10, but with fewer options. Whichever method you end up using, don't forget to disable the Administrator account again when you no longer need it.